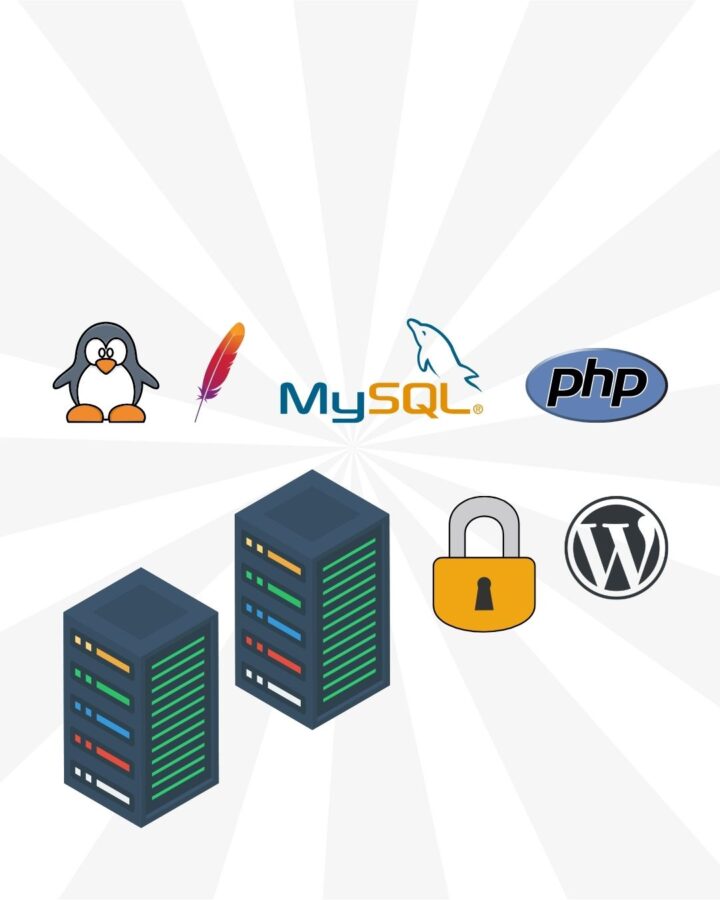
This is an in-depth guide to setting up a multi-tenant LAMP stack. The tutorial applies to AlmaLinux 10, but it also points out any differences you might see on Debian-based systems like Ubuntu. We will set up the Apache web server (httpd on RHEL-based systems, apache2 on Debian), create virtual hosts for multiple domains, and protect everything with SSL certificates using Certbot. We will also install PHP and MariaDB (MySQL on Debian-based systems), secure phpMyAdmin, and get it ready for WordPress. This tutorial follows with you how to install WordPress and test its performance with ApacheBench. LAMP was the quiet workhorse behind millions of sites, from personal blogs to enterprise applications, before cloud-native platforms, containers, and serverless functions became popular. LAMP is not a product; it is a proven stack made up of:
- Linux (operating system)
- Apache (web server)
- MySQL (database)
- PHP (scripting language)
They make a flexible, low-cost, robust base for hosting web apps. Even in 2025, LAMP is a great choice if you want something that is easy to use, gives you control, and works well. So, let’s get going.
Installing httpd or apache2
Apache HTTP Server, or httpd on RHEL-based systems like AlmaLinux and apache2 on Debian-based systems like Ubuntu, is a mature, high-performance web server that works well with WordPress. Let’s get it set up.
sudo dnf update -y && sudo dnf install -y httpd
On systems based on Debian, like Ubuntu:
sudo apt update -y && sudo apt install -y apache2
Run the web server and turn it on.
systemctl start httpd
systemctl enable httpd
systemctl status httpd
Set Up Apache Virtual Hosts to Host Multiple Websites
Step 1: Make a directory for each website.
Let’s share the directories of the hosted sites. Here, I will use two subdomains. But you can use any domains you want. The method is the same.
sudo mkdir -p /var/www/site1.corefortify.com/public_html
sudo mkdir -p /var/www/site2.corefortify.com/public_html
Make the Apache user the owner (apache on AlmaLinux):
sudo chown -R apache:apache /var/www/site1.corefortify.com
sudo chown -R apache:apache /var/www/site2.corefortify.com
For Debian-based Linux distributions, such as Ubuntu, the command would be to switch apache with www-data. This is because Debian and its offshoots usually use the www-data user and group for the web server (Apache or Nginx) instead of apache.
sudo chown -R www-data:www-data /var/www/site1.corefortify.com
sudo chown -R www-data:www-data /var/www/site2.corefortify.com
Set safe permissions:
sudo chmod -R 755 /var/www
Before installing WordPress, make sure that virtual hosts are working.
echo "<h1>site1.corefortify.com – Ready</h1>" | sudo tee /var/www/site1.corefortify.com/public_html/index.html
echo "<h1>site2.corefortify.com – Ready</h1>" | sudo tee /var/www/site2.corefortify.com/public_html/index.html
Step 2: Set up Apache Virtual Host Configurations
Follow AlmaLinux rules and put config files in /etc/httpd/conf.d/.
For corefortify.com:
sudo tee /etc/httpd/conf.d/site1.corefortify.com.conf <<EOF
<VirtualHost *:80>
    ServerName site1.corefortify.com
    DocumentRoot /var/www/site1.corefortify.com/public_html
    <Directory /var/www/site1.corefortify.com/public_html>
        Options -Indexes +FollowSymLinks
        AllowOverride All
        Require all granted
    </Directory>
    ErrorLog /var/log/httpd/site1_corefortify_error.log
    CustomLog /var/log/httpd/site1_corefortify_access.log combined
</VirtualHost>
EOF
For site2.corefortify.com:
sudo tee /etc/httpd/conf.d/site2.corefortify.com.conf <<EOF
<VirtualHost *:80>
    ServerName site2.corefortify.com
    DocumentRoot /var/www/site2.corefortify.com/public_html
    <Directory /var/www/site2.corefortify.com/public_html>
        Options -Indexes +FollowSymLinks
        AllowOverride All
        Require all granted
    </Directory>
    ErrorLog /var/log/httpd/site2_corefortify_error.log
    CustomLog /var/log/httpd/site2_corefortify_access.log combined
</VirtualHost>
EOF
Check and reload Apache:
sudo httpd -t
Expected output: Syntax is OK
For systems based on Debian (like Ubuntu):
sudo apache2ctl configtest
Start the Apache server again:
sudo systemctl reload httpd
In Cloudflare, add an A record for each website that points to the server’s IP address. After that, you can look through the domains you added to the virtual host.
Use HTTPS to make your website safe by adding an SSL certificate.
We will use certbot to speed up the process of installing the SSL certificate.
sudo dnf install -y epel-release
sudo dnf install certbot python3-certbot-apache -y
On systems based on Debian, like Ubuntu:
sudo apt update && sudo apt install certbot python3-certbot-apache
Get an SSL certificate for every domain. You will need to enter your email address and agree to the terms of use on letsencrypt.org.
certbot --apache -d site1.corefortify.com
certbot --apache -d site2.corefortify.com
To look at the log, use sudo cat /var/log/letsencrypt/letsencrypt.log.
This bot made a new config file for each website. The new conf file for https requests can be found at the following path: SITENAME-le-ssl.conf
ls -latr /etc/httpd/conf.d/
On systems based on Debian (like Ubuntu):
ls -latr /etc/apache2/sites-available/
Let’s look at what site1.corefortify.com-le-ssl.conf says.
sudo nano /etc/httpd/conf.d/site1.corefortify.com-le-ssl.conf
<IfModule mod_ssl.c>
<VirtualHost *:443>
    ServerName site1.corefortify.com
    DocumentRoot /var/www/site1.corefortify.com/public_html
    <Directory /var/www/site1.corefortify.com/public_html>
        Options -Indexes +FollowSymLinks
        AllowOverride All
        Require all granted
    </Directory>
    ErrorLog /var/log/httpd/site1_corefortify_error.log
    CustomLog /var/log/httpd/site1_corefortify_access.log combined
    SSLCertificateFile /etc/letsencrypt/live/site1.corefortify.com/fullchain.pem
    SSLCertificateKeyFile /etc/letsencrypt/live/site1.corefortify.com/privkey.pem
    Include /etc/letsencrypt/options-ssl-apache.conf
</VirtualHost>
</IfModule>
The DocumentRoot stayed the same, but the port changed from 80 to 443. Let’s read the old conf file that we wrote in the last section and that uses the http protocol.
sudo vim /etc/httpd/conf.d/site1.corefortify.com.conf
Check out the end of the file. The certbot added the direction rule to HTTP Virtual Host to automatically send all users from http to https.
RewriteEngine on
RewriteCond %{SERVER_NAME} =site1.corefortify.com
RewriteRule ^ https://%{SERVER_NAME}%{REQUEST_URI} [END,NE,R=permanent]
From now on, all apache2 rules should be written in the file site1.corefortify.com-le-ssl.conf. This is because http will automatically be redirected to https.
This bot will run two times a day to renew all of the certificates that have expired. To check that this service is on, please run the commands:
systemctl start certbot-renew.timer
systemctl status certbot-renew.timer
On systems based on Debian (like Ubuntu):
systemctl status certbot.timer
Set up and protect the web server
When you run websites on an Apache web server, you’ll often have to change settings like URL rewriting, access control, or caching rules. You can do this in two main ways with Apache: by editing the main configuration file (apache2.conf on Debian-based systems or /etc/httpd/conf/httpd.conf on RHEL-based systems) or by using .htaccess files at the directory level. Both can get similar results, but they are very different in terms of performance, security, and ease of maintenance. Knowing about these differences will help you make better, more scalable choices.
A Quick Look at the Main Differences
| Feature | .htaccess | apache2.conf / httpd.conf |
|---|---|---|
| Performance | ❌ Slower: Apache checks for and reads .htaccess on every request, which slows things down. | ✅ Faster: Loaded once when the server starts, so there is no overhead for each request. |
| Security | ⚠️ Not as safe: Files are stored in directories that anyone can access on the web. If not set up correctly, they can show sensitive rules or be changed by users. | ✅ More secure because only server admins can change things. Lessens the chance that site owners will accidentally misconfigure things. |
| Maintainability | ❌ Harder to track: Rules are spread out over directories. | ✅ Easier to manage at scale: All settings are in one place. |
| Ease of Use | ✅ Easy to use for non-admins: Site owners can change settings without having to change the main server config, which is great for shared environments. | ⚠️ Needs server access: You need root or admin rights to change and reload Apache. Not the best choice for shared hosting. |
| Service Restart | ✅ No need for an apache service restart. | ⚠️ Yes: Changes only take effect after reloading or restarting Apache (sudo systemctl reload apache2). |
Adding centralized configuration to compress content by the Apache server will cut down on loading time and save bandwidth. The Apache web server has a powerful module called mod_deflate that can do this, but there are two main ways to set it up: by editing the main server configuration file, httpd.conf, or by using .htaccess files.
Both methods get you to the same goal, but they have different effects on performance, security, and ease of use. To build a professional, high-performing web environment, you need to know the difference.
Step 1: Make sure mod_deflate is turned on
For Debian-based systems like Ubuntu, type this in:
sudo a2enmod deflate
sudo systemctl restart apache2
On systems that use RHEL, mod_deflate (which is used for gzip compression) is usually compiled into Apache by default and turned on automatically. You usually don’t have to turn it on by hand.
You can add the compression rules to your global Apache configuration once you are sure that the module is working.
Step 2: Make the Global Deflate Configuration File
The best way to do this on AlmaLinux is to make a separate configuration file for the module in the /etc/httpd/conf.d/ directory. This keeps your main httpd.conf file neat and makes it easy to change your compression settings.
sudo nano /etc/httpd/conf.d/deflate.conf
# ----------------------------------------------------------------------
# Settings for mod_deflate
# ----------------------------------------------------------------------
<IfModule mod_deflate.c>
    # This is the main switch. It tells Apache to use the DEFLATE
    # output filter to compress the content before sending it to the client.
    SetOutputFilter DEFLATE

    # --- What to Compress ---
    # Use AddOutputFilterByType to tell the server which MIME types to compress.
    # Only compress text-based content when you need to. Don't compress
    # pictures, videos, or PDFs because they are already compressed and you
    # will just waste CPU cycles.
    AddOutputFilterByType DEFLATE text/plain
    AddOutputFilterByType DEFLATE text/html
    AddOutputFilterByType DEFLATE text/xml
    AddOutputFilterByType DEFLATE text/css
    AddOutputFilterByType DEFLATE application/xml
    AddOutputFilterByType DEFLATE application/xhtml+xml
    AddOutputFilterByType DEFLATE application/rss+xml
    AddOutputFilterByType DEFLATE application/javascript
    AddOutputFilterByType DEFLATE application/x-javascript
    AddOutputFilterByType DEFLATE application/json
    AddOutputFilterByType DEFLATE image/svg+xml
    AddOutputFilterByType DEFLATE font/woff
    AddOutputFilterByType DEFLATE font/woff2

    # --- Works with Different Browsers ---
    # These lines fix problems that some older browsers are known to have.
    BrowserMatch ^Mozilla/4 gzip-only-text/html
    BrowserMatch ^Mozilla/4\.0[678] no-gzip
    BrowserMatch \bMSIE !no-gzip !gzip-only-text/html

    # --- Logging ---
    # You can add the compression ratio to your access logs if you want to.
    # You will also need to change your LogFormat directive to include %{ratio}n.
    DeflateFilterNote Input instream
    DeflateFilterNote Output outstream
    DeflateFilterNote Ratio ratio
</IfModule>
Step 3: Restart the Apache server and test it.
It is very important to check your configuration for syntax errors before making any changes. This stops you from accidentally shutting down your server.
sudo httpd -t
For Ubuntu:
sudo apachectl configtest
If you see “Syntax OK,” you can safely make the changes and do a graceful reload, which means there will be no downtime.
sudo systemctl reload httpd
OR
sudo apachectl graceful
You have successfully turned on content compression for all HTTPS traffic to all of your hosted sites by putting the configuration here.
Setting up the php and mysql database server
sudo dnf install php php-mysqlnd
On systems that are based on Debian (like Ubuntu):
sudo apt update && sudo apt install php php-mysql libapache2-mod-php
Start the apache server again.
sudo systemctl restart httpd
OR
sudo systemctl restart apache2
check the version of PHP that is installed:
php -v
MariaDB is not included in the default AlmaLinux 10 repositories, so you have to install it yourself. This is a big change from earlier versions. It looks like AlmaLinux has fully switched to providing MariaDB as the default MySQL-compatible database server, just like the rest of the RHEL ecosystem.
sudo dnf install mariadb-server -y
sudo systemctl start mariadb
sudo systemctl enable mariadb
sudo mysql_secure_installation
On systems that are based on Debian (like Ubuntu):
sudo apt update && sudo apt install mysql-server
Once it is installed, it will run on its own. Check the status.
systemctl status mysql
The server now has the full LAMP stack installed and it’s ready to install apps.
setting up and protecting phpmyadmin
sudo dnf install phpmyadmin -y
On systems based on Debian (like Ubuntu):
sudo apt install phpmyadmin -y
Follow the steps to add your username and password.
By default, phpMyAdmin on AlmaLinux only lets the server itself (localhost) connect to it for security reasons. We will make it available to everyone, but we will change the string from /phpmyadmin to a random string. You can hide your login page from all of these low-effort, automated attacks by changing the URL to a random string. To even find the login page, an attacker would have to specifically go after your server and use advanced scanning tools.
Let’s change the phpmyadmin conf to do that.
sudo nano /etc/httpd/conf.d/phpMyAdmin.conf
This is the string I’ll use: dbmng2305
and open the path to the public and require everyone to do so:
Alias /dbmng2305 /usr/share/phpMyAdmin

<Directory /usr/share/phpMyAdmin/>
   AddDefaultCharset UTF-8
   Require all granted
</Directory>

<Directory /usr/share/phpMyAdmin/setup/>
   Require all granted
</Directory>
Leave the rest of the file alone. Restart the Apache server and go to https://domainname/dbmng2305.
Make a database and a user in phpMyAdmin.
- To get to the User accounts tab, log in to phpMyAdmin and click on the top navigation menu.
- Click the Add user account link below the list of current users.
- Type in a new Username and a strong Password in the Login Information section. Press the “Generate” button to make a password that is safe.
- In the box below, check the box next to “Create database with the same name and grant all privileges.” This is the most important step because it does everything at once.
- Please do not check any of the boxes in the Global privileges section for security reasons. This is very important to make sure that the new user can only get to their own database.
- To finish, scroll to the bottom of the page and click the Go button.
You should now have two databases with usernames for two WordPress websites that we will host on our server. The last step is to enter these credentials when you set up WordPress.
Setting up WordPress
cd /tmp
wget https://wordpress.org/latest.tar.gz
tar -xzvf latest.tar.gz
Delete any test index.html files in the public_html folder in /var/www/site1/public_html and /var/www/site2/public_html.
Move the folder that was extracted and called wordpress.
sudo mv wordpress/* /var/www/site1.corefortify.com/public_html/
To start the WordPress installation, go to the domain name and use the username and database you made in phpMyAdmin. Congratulations! You now have multi-tenant hosting on a single server.
Use ApacheBench to check how well your server works.
ab -n 10000 -c 100 https://site2.corefortify.com/
ab: The name of the program ApacheBench.-n 10000: The number of requests that need to be made for the test. You sent 10,000 hits.-c 100: The level of concurrency. This is how many requests can be made at once. You made it look like 100 people were using the site at the same time.https://site2.corefortify.com/: The URL of the target.
You told your server in plain English, “Pretend that 100 people are hitting my homepage at the same time, and keep doing it until you’ve served 10,000 pages. I want to see how you handle it.”
This is one of the best tables. It shows how steady the performance was.
| Percentage of requests served | Time (ms) |
|---|---|
| 50% | 7612 |
| 66% | 8404 |
| 75% | 9004 |
| 80% | 9486 |
| 90% | 11199 |
| 95% | 11589 |
| 98% | 11882 |
| 99% | 12009 |
| 100% | 12594 (longest request) |
That’s not nice.
- 50% 7612: This is the median time it takes to respond. It means that 5,000 of your users had to wait more than 7.6 seconds for the page to load.
- 100% 12594 (longest request): The request that took the longest during the whole test took almost 12.6 seconds to finish.
Final Thoughts
This method turns one server from a solo performer into a flexible orchestra that can put on a rich and varied show for people all over the world. The result is a powerful, cost-effective, and scalable platform that any developer would love.